Passport
Introduction
Passport is middleware for Node.js that makes it easy to implement authentication and authorization. It is extremely flexible and modular, Passport can be unobtrusively dropped in to any Express-based web application. It is a comprehensive set of strategies support authentication using a username and password, Google, Facebook, Twitter, and more.
Username & Password
Lets create a small demo with username/password session based authentication in your Node.js application.
Passport library connects with express-session middleware and attach authenticated user information to req.session object. We will store this session object to MongoDB with connect-mongo package.
Now authentication will be detected with username/password Local Strategy in MongoDB. With LocalStrategy we are not going to create own function with steps to authenticate a user, instead we will use passport-local-mongoose simplifying the username and password authentication with our Mongoose User model.
Note
We are not use Node's crypto module to hash/verify password in this exercises. Read more about hashing/verifying password from Password web site Username/Password - example.
We are using passport-local-mongoose which will automatically do this for us.
Project and packages
First create a new password-demo project and install needed packages.
1 2 | |
1 2 3 4 5 6 7 8 | |
online
Yes - you can install all of those in one line, but now those are listed line by line, so you can see those better!
Include needed packages
Include below packages and create an express application in your index.js.
We will use a following packages:
- express to create web server with Node.js.
- express-session middleware to handle user session.
- passport to handle authentication.
- passport-local strategy for username and password authentication.
- mongoose to get connection to MongoDB
- connect-mongo to get sessions to with MongoDB
| index.js | |
|---|---|
1 2 3 4 5 6 7 8 9 10 11 12 13 14 15 | |
Create a User Model
Create a User Model to store User username, password and registrationDate. This model is leveraging the passport-local-mongoose package to simplify building username and password login with Passport.
Note
Passport-Local Mongoose will add hash and salt fields to stored user in MongoDB. You will see this later.
| models/user.js | |
|---|---|
1 2 3 4 5 6 7 8 9 10 11 12 13 14 15 16 17 18 19 20 21 22 23 24 25 | |
Include User model in your index.js application:
| index.js | |
|---|---|
1 2 | |
Connection to database
Connect your app to MongoDB and get a connection. We will fix some deprecation warnings.
| index.js | |
|---|---|
1 2 3 4 5 6 7 8 9 10 11 | |
Session configuration to MongoDB
MongoDB Store will be used to save a user session. Session will be initialized with express-session middleware, with a secret session key and some default operations required when initializing a session in express.
storeoption will be used to save session to MongoStoreunsetwithdestroyvalue will be used to remove stored session object from MongoDB when session is ended.
| index.js | |
|---|---|
1 2 3 4 5 6 7 | |
Local passport strategy
Create a local passport stategy and configure passport to persist user information in the login session with passport-local-mongoose. Now LocalStrategy strategy communicates with User model automatically and we don't need to create a steps with authentication. Check Password page how it can be done with step by step Verify Password.
Passport uses serializeUser function to persist user data after successful authentication into session. Function deserializeUser is used to retrieve user data from session. Finally you need to call initialize and session functions to initialize Passport use.
Understanding passport serialize deserialize
Good story about Understanding passport serialize deserialize
| index.js | |
|---|---|
1 2 3 4 5 6 7 8 | |
Register/Add a new user
A new user will be added with register function of passport-local-mongoose. This function will check that username is unique. Endpoint will send error or successfully message to the client.
| index.js | |
|---|---|
1 2 3 4 5 6 7 8 9 10 11 12 13 14 15 16 | |
Use Postman to send a new register request to server. Click image to see it bigger!
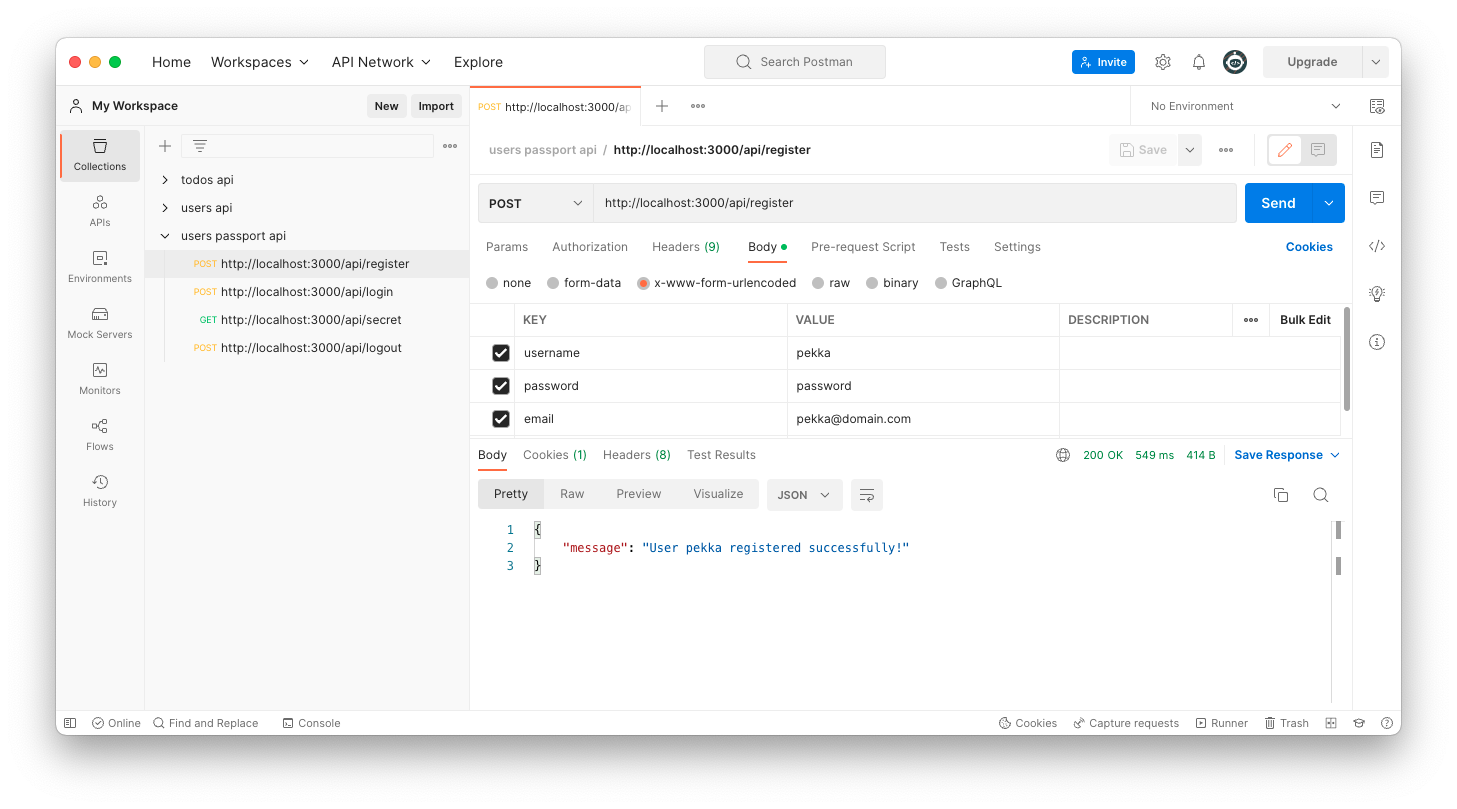
Look your MongoDB and find out that a new document has been created to users collection.

Note
Notice that there is no field for password at all, instead passport-local-mongoose created salt and hash. We didn’t have to define salt and hash fields in User schema. Passport-local-mongoose will keep username unique, if username already exist it will give UserExistsError.
Try to add same user again. You will get UserExistsError with A user with the given username is already registered message. This will send to your with passport-local-mongoose package with User model automatically. Click image to see it bigger!

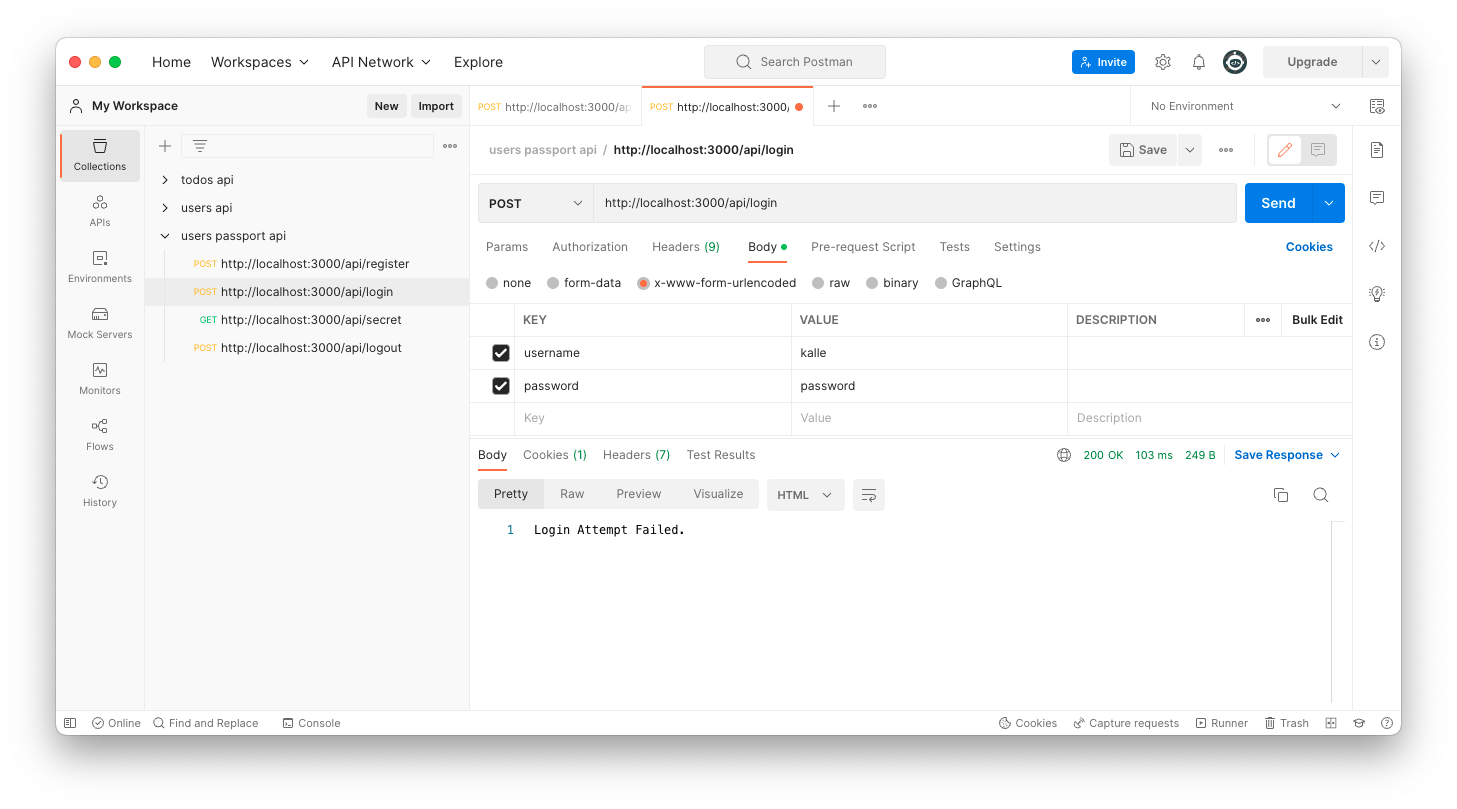
Login
Here we will use the local passport authenciation strategy with Passport - authenticate. In this route, passport.authenticate() is middleware which will authenticate the request. We will redirect request to login-ok or login-error routes, if there aren't any errors. Error situations will be handled with express error-handling.
| index.js | |
|---|---|
1 2 3 4 5 6 7 | |
Now, in login-ok or login-error routes we only show req.session object in console and send response back to the client.
| index.js | |
|---|---|
1 2 3 4 | |
| index.js | |
|---|---|
1 2 3 4 | |
Use Postman to send a login request to server. Click image to see it bigger!

Look stored session document from MongoDB.

Try to use username that doesn't exists or with wrong password. Click image to see it bigger!
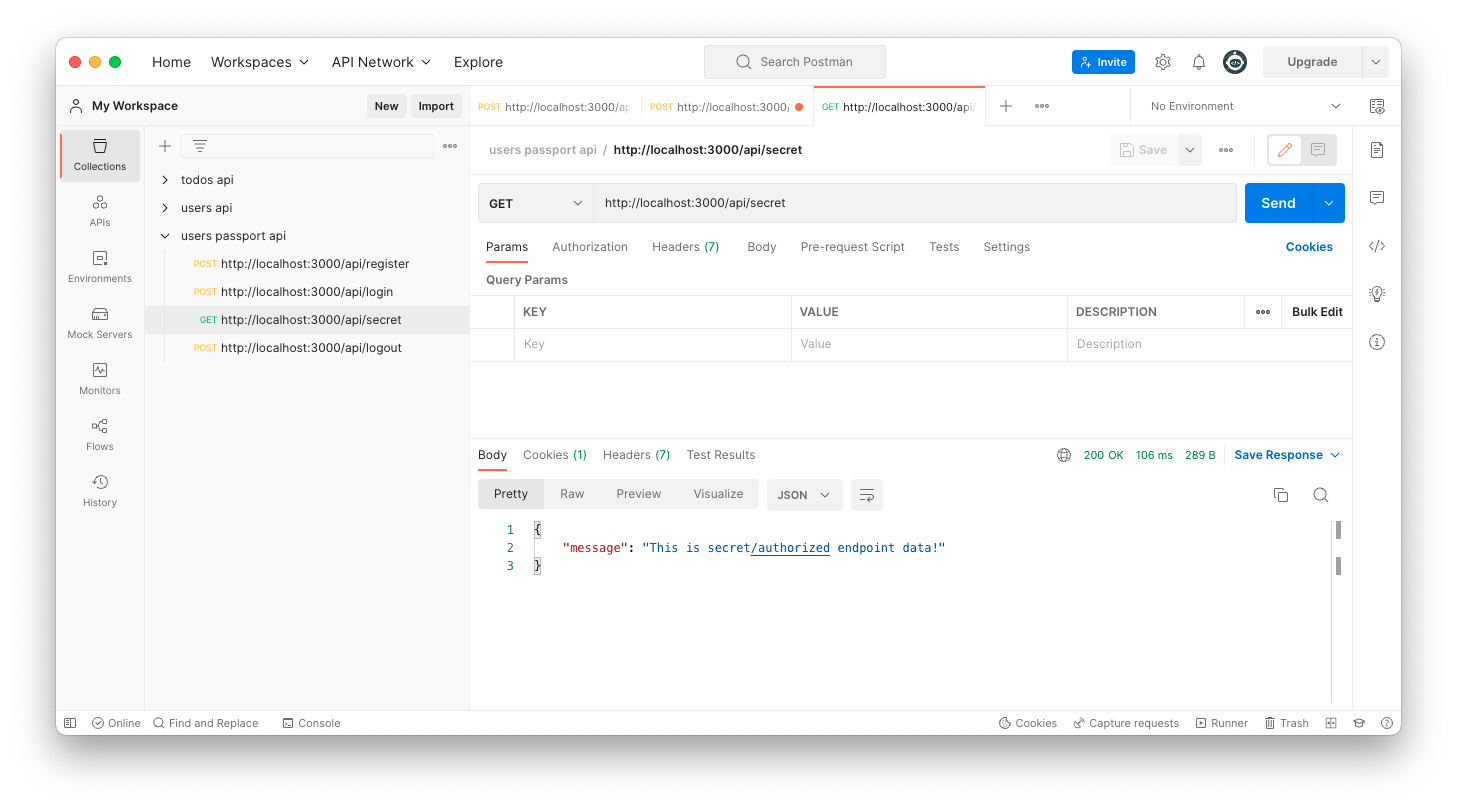
Secret content endpoint
This secret endpoint is just created to test that login/authorization is working correctly. Here we call Passport's isAuthenticated function to check if the request is authenticated or not. It will return true in case an authenticated user is present in req.session.passport.user.
| index.js | |
|---|---|
1 2 3 4 5 6 7 8 | |
Use Postman to send a request to get some data with correct authentication user. Click image to see it bigger!
Logout
Final task is to logout and remove session object. Use Passport - logout to terminate a login session. Set req.session object to null and it will removed from MongoDB.
| index.js | |
|---|---|
1 2 3 4 5 6 7 8 9 10 11 12 13 | |
Use Postman to send a logout request. Click image to see it bigger!

Try again call secret/authenticated data endpoint when user is logged out. You shoud get User is not authenticated! message as a response. Click image to see it bigger!

Read More
- Passport
- Passport - npm
- passport-local
- express
- express-session
- mongoose
- connect-mongo
- passport-local-mongoose
Goals of this topic
Understand
- Authentication and authorization with Passport - username/password.